Starting your first welding project can be exciting and daunting if you're a beginner welder. But fear not! Small welding projects are ideal for getting your feet wet in this interesting profession without feeling overwhelmed.
This guide will explore 20 small welding project ideas perfect for beginners. These projects are not only manageable but also incredibly rewarding. They range from practical items for your home or shop to creative pieces that can add a personal touch to your surroundings. Whether you're a student, a DIY enthusiast, or someone looking to develop a new hobby, these projects are tailored just for you.
As you embark on this journey, remember that every master welder started as a beginner. With each project you complete, you'll gain a new creation, confidence, skills, and a deeper understanding of welding. Let's ignite that welding torch and begin!
The Basics of Welding for Beginners
Before you start your first project, it's essential to understand the basics of welding. Welding is the process of joining two pieces of metal together by melting a filler material at their interface, creating a strong joint. Several welding methods, such as metal inert gas (MIG), tungsten inert gas (TIG), and stick welding (SMAW), have unique applications and techniques.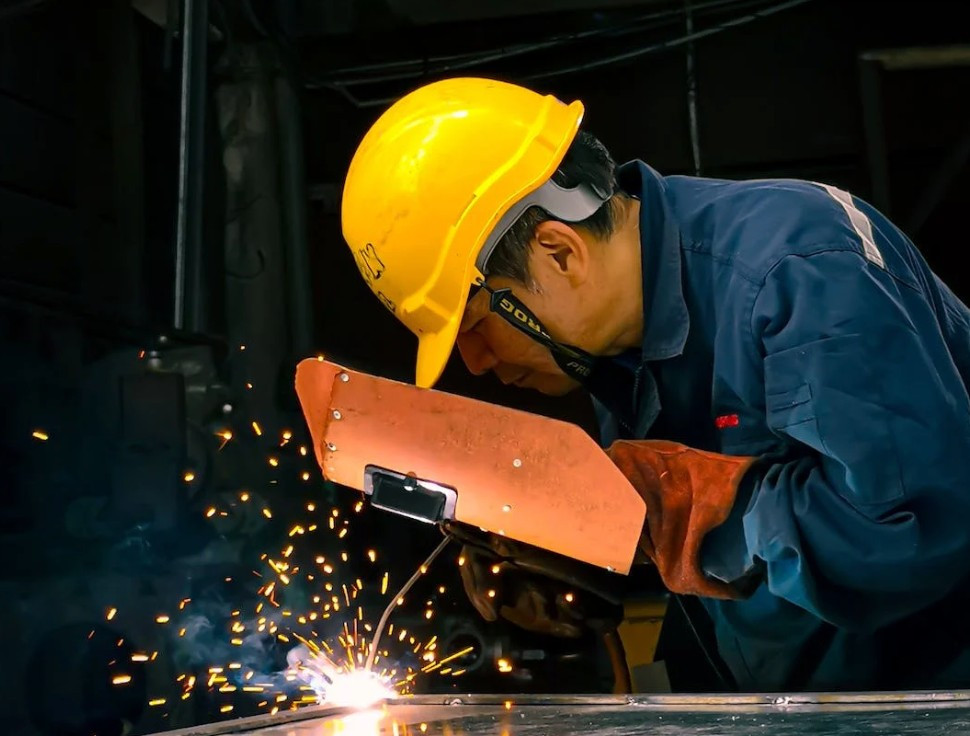
Remember, welding is as much an art as it is a skill. Patience and practice are your best tools. Don't be discouraged by initial mistakes; they're part of the learning process. Start with simple projects and gradually move to more complex ones as you gain confidence and improve your technique.
Small Welding Project Ideas for Beginners, Students
1. Simple Steel Bookends
Steel bookends are ideal for practising basic welding skills. This useful product enhances organization and adds a touch of industrial aesthetic to any bookshelf. This project is an excellent start for beginners to learn essential welding techniques.
Materials Required: Two flat steel pieces (each 6 inches x 4 inches), welding machine, welding helmet, gloves, metal sandpaper, paint or varnish (optional).
Steps:
Cleaning: Clean the steel pieces to prepare them for welding.
Welding: Position the steel pieces at a right angle and weld them along the joining edge.
Smoothing Edges: After cooling, smooth any rough edges with metal sandpaper.
Finishing Touches: Optionally, apply paint or varnish for a customized look.
2. Customized Metal Picture Frame
Crafting a metal picture frame is an excellent project for beginners to explore creativity in welding. This project helps master basic welding and cutting techniques and results in a personalized item that can be used for home decoration or as a handmade gift.
Materials Required: Four metal strips for the frame, one sheet metal for backing, welding machine, clamps, metal cutter, welding helmet, and gloves.
Steps:
Cutting to Size: Measure and cut the metal strips and sheet metal to the desired dimensions for your frame.
Frame Assembly: Weld the metal strips at the corners to form a rectangle or square.
Attaching Backing: Weld the sheet metal to the back of the frame for support.
Customization: Add personal touches by welding additional decorative elements as desired.
3. Handcrafted Steel Coasters
Steel coasters are an excellent small welding project for beginners, blending utility with artistic design. This project introduces basic shaping and welding techniques, offering a chance to create functional yet aesthetically pleasing items for personal use or as handmade gifts.
Materials Required: Small steel squares, felt pads, welding machine, welding helmet, gloves, metal grinder.
Steps:
Cutting Squares: Cut the steel into small squares suitable for coasters.
Welding Design: Weld small decorative elements onto the squares if desired.
Grinding and Smoothing: Use a metal grinder to smooth the surfaces and edges.
Attaching Felt Pads: Stick felt pads on the bottom to prevent scratching surfaces.
4. Mini BBQ Grill
Building a mini BBQ grill is a functional project for outdoor enthusiasts and beginner welders. It encompasses fundamental welding skills and offers a practical understanding of metal construction and thermal properties, resulting in a usable and enjoyable product.
Materials Required: Sheet metal, metal pipes or rods, hinges, welding machine, metal cutter, welding helmet, gloves.
Steps:
Constructing the Frame: Cut and weld the sheet metal to form the grill base and lid.
Adding Legs and Handles: Attach metal pipes or rods as legs and a handle.
Installing Hinges: Secure hinges to connect the lid to the base.
Final Assembly: Ensure all parts are securely welded, and the grill is stable.
5. Decorative Garden Art
Decorative garden art allows beginners to explore the creative side of welding, developing skills in shaping and joining metal. This project enhances garden aesthetics and provides a practical application of artistic welding techniques.
Materials Required: Various metal pieces, welding machine, metal cutter, welding helmet, gloves, and paint (optional).
Steps:
Design Planning: Sketch a basic design or layout for the garden art.
Cutting and Shaping: Cut and shape metal pieces according to the design.
Welding Pieces Together: Weld the pieces to create the artistic structure.
Painting and Finishing: Paint the structure for additional weather protection and aesthetic appeal.
6. Metal Plant Holders
Metal plant holders are a delightful project for gardeners and those new to welding. This project involves basic welding and bending techniques, resulting in elegant holders that enhance any garden or indoor plant display.
Materials Required: Metal rods or strips, welding machine, metal bender, welding helmet, gloves.
Steps:
Designing the Holder: Decide on the size and shape of the plant holder.
Bending Metal: Bend the metal rods or strips to the desired shape.
Welding: Weld the joints to secure the holder's shape.
Finishing Touches: Clean and optionally paint the holder for a polished look.
7. Simple Tool Rack for the Shop
A simple tool rack is an excellent project for organizing welding tools in the shop. It introduces beginners to functional welding projects, focusing on practicality and space management, and offers experience in creating useful workshop accessories.
Materials Required: Metal bars or rods, welding machine, metal cutter, welding helmet, gloves.
Steps:
Planning the Layout: Determine the size and number of tools to accommodate.
Cutting and Shaping: Cut the metal to create the frame and tool holders.
Assembly: Weld the pieces together to form the rack.
Mounting: Secure the rack to a wall or workbench as needed.
8. Metal Candle Holders
Crafting metal candle holders is a basic yet elegant project for beginners. It allows the exploration of aesthetic design in welding, producing functional art that enhances any setting, from a cosy dinner table to a relaxing bath.
Materials Required: Metal sheets or rods, welding machine, metal cutter, welding helmet, gloves.
Steps:
Designing: Choose a design for the candle holder - simple or intricate.
Cutting and Shaping: Cut and shape the metal according to the design.
Welding: Weld the pieces together to form the holder.
Finishing Touches: Sand any rough edges and optionally add a protective coating.
9. Customized Metal Key Holder
A metal key holder is a small yet practical welding project for beginners. It provides an opportunity to practice precise welding and cutting, resulting in a useful item for everyday organization.
Materials Required: Small metal plate, hooks or small rods, welding machine, metal cutter, welding helmet, gloves.
Steps:
Cutting the Base: Cut the metal plate to the desired size for the key holder.
Attaching Hooks: Weld hooks or bent rods to the plate for keys.
Customization: Add personalized touches or decorative elements.
Mounting: Prepare the holder for wall mounting with appropriate fixtures.
10. Steel Nameplate for the House
Creating a steel nameplate is a personalized project suitable for beginners. It not only serves as an attractive addition to any home but also offers a chance to work on detailed welding and lettering techniques.
Materials Required: Steel plate, letter stencils, welding machine, metal cutter, welding helmet, gloves.
Steps:
Designing the Nameplate: Plan the layout and size of the nameplate.
Cutting Letters: Use stencils to cut out letters from the steel.
Welding: Carefully weld the letters onto the steel plate.
Finishing: Clean and treat the nameplate for weather resistance.
Advanced Small Welding Projects for Enthusiast
1. Wine Bottle Holder
The wine bottle holder is a more complex project, perfect for those looking to enhance their welding skills. This project involves precision and creativity, resulting in a functional and stylish item ideal for hobbyists interested in combining art with utility.
Materials Required: Metal rods or sheets, welding machine, metal bender, welding helmet, gloves.
Steps:
Designing: Sketch the holder design, considering the size and shape of a standard wine bottle.
Shaping Metal: Bend and shape the metal to match your design.
Welding: Carefully weld the pieces together, ensuring stability and balance.
Finishing Touches: Sand and possibly paint or coat the holder for a sleek look.
2. Metal Magazine Rack
Crafting a metal magazine rack challenges students to create a functional and stylish item. This project enhances skills in metal cutting, bending, and precise welding, resulting in a useful home accessory.
Materials Required: Sheet metal or metal rods, welding machine, metal cutter, welding helmet, gloves.
Steps:
Planning the Design: Decide on the size and style of the rack.
Cutting and Bending: Cut and bend the metal into the desired shape.
Assembly: Weld the parts together, focusing on clean joints and stability.
Finishing: Sand any rough edges and apply a protective finish if desired.
3. Handmade Metal Clock
Building a metal clock introduces students to precision welding projects. This task demands accuracy in both design and execution, resulting in a functional and artistic timepiece.
Materials Required: Metal sheet, clock mechanism, welding machine, metal cutter, welding helmet, gloves.
Steps:
Designing the Clock Face: Plan the layout of numbers and hands.
Cutting and Shaping: Cut the metal into the clock face and numbers.
Welding: Attach the numbers and decorative elements to the face.
Assembling the Mechanism: Secure the clock mechanism behind the face.
4. Fire Pit for Outdoor Use
Constructing a fire pit is a slightly more complex project, ideal for outdoor use. It involves larger-scale welding and design planning, offering a practical understanding of metalwork for heating and outdoor entertainment.
Materials Required: Large metal sheet or pre-cut rings, metal legs, welding machine, welding helmet, gloves.
Steps:
Planning the Pit Size: Determine the diameter and depth.
Shaping the Pit: Weld the metal sheets or rings into a bowl shape.
Attaching Legs: Add legs or a base for stability.
Safety Features: Ensure edges are smooth and the structure is secure.
5. Steel Serving Tray
A steel serving tray is an elegant project that combines functionality with aesthetic appeal. This project allows students to practice detailed welding and metal finishing techniques.
Materials Required: Sheet metal, metal handles, welding machine, metal grinder, welding helmet, gloves.
Steps:
Cutting the Tray Base: Cut the sheet metal to the desired tray size.
Attaching Handles: Weld handles on either side for easy carrying.
Grinding and Polishing: Smooth the surface and edges for a refined finish.
Decorative Touches: Add any artistic elements or engravings as desired.
6. Wall Mounted Metal Shelf
Creating a wall-mounted metal shelf is an excellent project for a home organization. This project enhances skills in precise measurements, cutting, and welding, leading to a useful and sturdy shelving unit.
Materials Required: Metal sheets or bars, welding machine, metal cutter, welding helmet, gloves.
Steps:
Designing the Shelf: Plan the size and number of shelves.
Cutting Metal Pieces: Cut the metal to the required dimensions.
Welding Shelves: Weld the shelves to the frame or supports.
Mounting Preparation: Add brackets or holes for wall mounting.
Welding Projects Ideas for Students
For students learning welding, it's essential to start with projects that focus on building fundamental skills and techniques. These projects not only provide a hands-on learning experience but also lay the foundation for more complex welding tasks. Here are four welding projects ideal for students:
1. Welded Cube
The welded cube is an excellent starting point for students. It teaches the basics of measuring, cutting, and welding metal while aiming for precision in creating a cube-shaped structure. This project enhances skills in making clean and accurate welds at right angles.
Materials Required: Metal rods, welding machine, metal cutter, welding helmet, gloves.
Steps:
Measuring and Cutting: Cut metal rods to equal lengths for the cube's sides.
Tack Welding: Secure the corners with tack welds.
Welding: Complete the welds at the corners to form the cube.
Finishing: Grind any rough welds for a smooth finish.
2. Metal Coat Hook
The metal coat hook project introduces students to welding while creating a functional item. It emphasizes precise measuring, shaping, and welding to produce a coat hook that can be used daily.
Materials Required: Metal rods or sheets, welding machine, metal cutter, welding helmet, gloves.
Steps:
Design and Measurement: Plan the design and measure the metal for the hook and base.
Shaping: Bend the metal into the desired hook shape.
Welding: Weld the hook to the base securely.
Finishing: Smooth any rough edges and add protective coating if needed.
3. Welded Plant Stand
The welded plant stand project combines welding skills with creativity. Students learn to measure, cut, weld, and create a functional yet decorative piece for holding plants indoors or in the garden.
Materials Required: Metal rods or sheets, welding machine, metal cutter, welding helmet, gloves.
Steps:
Planning the Design: Decide on the stand's height and shape.
Cutting Metal: Cut and shape the metal to create the stand.
Welding: Weld the components together securely.
Painting: Apply a suitable finish for added protection and style.
4. Metal Garden Sculpture
Creating a metal garden sculpture is an advanced project that challenges students to apply their welding skills artistically. It involves design planning, precise cutting, and welding, resulting in a decorative outdoor piece.
Materials Required: Various metal pieces, welding machine, metal cutter, welding helmet, and gloves.
Steps:
Design and Layout: Sketch a design for the sculpture and gather metal pieces.
Cutting and Shaping: Cut and shape metal pieces to match the design.
Welding Assembly: Weld the pieces together according to the design.
Finishing: Clean, smooth edges, and add protective coatings as necessary.
These student welding projects are carefully selected to provide a progressive learning experience. They focus on fundamental skills and techniques, allowing students to create practical and artistic pieces.
8 Tips for Small Welding Projects Success
Becoming a skilled welder takes focus on detail and a dedication to safety. For success in small projects, these top 8 welding tips are crucial. We'll walk you through all the important factors, from material selection to joint preparation, to ensure your welds are accurate, robust, and aesthetically pleasing.
1. Material Selection: Choose the right material for your project. Common options include mild steel, stainless steel, and aluminium. Consider factors like strength, appearance, and corrosion resistance.
2. Safety First: Prioritize safety by wearing appropriate protective gear, including a welding helmet, gloves, and a welding jacket. Ensure proper ventilation in your workspace to avoid inhaling harmful fumes.
3. Cleanliness Matters: Clean the metal surfaces thoroughly before welding. Remove any rust, paint, or contaminants that can affect the quality of your welds.
4. Measure Twice, Cut Once: Precision is key in welding. Measure and mark your metal accurately before cutting or welding to avoid errors and ensure a precise fit.
5. Joint Preparation: Properly prepare the joints to be welded. Beveling, chamfering, or using the right joint configuration (e.g., butt joint, lap joint) can significantly impact the strength and quality of your weld.
6. Welding Technique: Practice your welding before starting the project. Maintain a steady hand and control your welding speed to create consistent and strong welds.
7. Finishing Touches: Pay attention to finishing. After welding, grind any excess material or rough welds to achieve a smooth and polished appearance. You can also apply paint or coatings for added protection and aesthetics.
8. Common Mistakes to Avoid: Here are some common mistakes to watch out for:
Overheating: Excessively high heat can warp or weaken the metal. Practice good heat control.
Incomplete Penetration: Ensure that your weld penetrates the full thickness of the metal for maximum strength.
Lack of Fusion: Proper fusion between the base and filler metals is crucial for a strong weld. Inspect for any gaps or lack of fusion.
Wrong Electrode or Filler Rod: Use the correct electrode or filler rod for the metal you're welding. Different materials require different consumables.
Ignoring Polarity: Pay attention to polarity when using a MIG or TIG welder. Using the wrong polarity can result in poor weld quality.
Beginners Benefits of Starting with Small Welding Projects
Are you eager to explore the fascinating field of metalwork? Small welding projects are ideal for developing your abilities and self-assurance. There are many benefits to starting small with welding projects. Here are ten advantages to think about:
Skill Development: Small welding projects are a perfect training ground for beginners. They allow you to gradually develop and refine your welding techniques.
Safety First: Working on smaller pieces often means dealing with less heat and fewer safety risks than larger, more complex projects. This provides a safer learning environment.
Cost-Efficiency: Smaller projects require fewer materials and consumables, making them budget-friendly for those just starting.
Quick Gratification: Completing small projects provides a sense of accomplishment in a shorter time frame. This immediate gratification can be motivating.
Fundamental Mastery: Small projects emphasize fundamental skills like measuring, cutting, and basic welding, ensuring a strong foundation for future endeavours.
Error Tolerance: Smaller mistakes in small projects are easier to rectify than in larger, more intricate works, allowing you to learn from errors without major setbacks.
Variety and Creativity: Small projects offer a wide range of creative possibilities. You can experiment with different designs and styles without a significant investment.
Space Efficiency: Limited workspace is not a hindrance for small projects. You can comfortably work on them in a small garage or workshop.
Portability: Smaller finished items are easy to transport and share with friends or sell as handmade crafts.
Building Confidence: Completing small projects boosts your confidence, encouraging you to take on more challenging endeavours.
Resources for Further Learning
As a beginner looking to develop your welding skills, check out the American Welding Society's website (aws.org), a valuable resource. Here, you can find comprehensive training materials, learn about welding certifications that can give you credentials, and use their welder finder tool to connect with professionals in your local area who can mentor you. A very accessible book for continuing your education is "Welding for Dummies" by Steven Robert Farnsworth. This covers key introductory topics like safety gear, metal compositions, joint configurations, and step-by-step techniques for the hands-on practice you need.
You may also benefit from online learning platforms to advance your welding education. Great options include Welding Tips and Tricks on YouTube, beginner courses on Udemy or LinkedIn Learning covering basics to specialized applications, and active welding forums like Weld Talk or Welding Web where you can get feedback from the community on your work and questions that come up along your way. To complement theory with more hands-on practice, you should see if a MakerSpace or metalworking shop in your community hosts open welding sessions. These hands-on learning opportunities can make a big difference as you build your welding skills.
Conclusion
The easy welding projects in this guide let you start building key skills with basic techniques and safety basics. Setting up a small home shop will give you real experience putting together these beginner projects. Piecing together these starters will help you better understand the steps. And feeling more confident with simpler welds means you’ll be ready to try more complex projects later on. So use these guides to begin gaining hands-on practice. Get your home shop ready, sparks flying, and have fun learning as you go. The more you weld, the more skilled you’ll become!