MIG (Metal Inert Gas) welding is one of the most common and easy-to-learn welding processes. It utilizes an arc between a continuous wire electrode and the base metal to produce a strong weld joint. The arc is shielded by an inert gas like argon or helium to protect it from atmospheric contamination. While MIG welding is more superficial than other processes, it is still prone to defects and errors if proper procedures are not followed. This comprehensive guide will overview some of the most common MIG welding mistakes, their causes, and, most importantly, tips t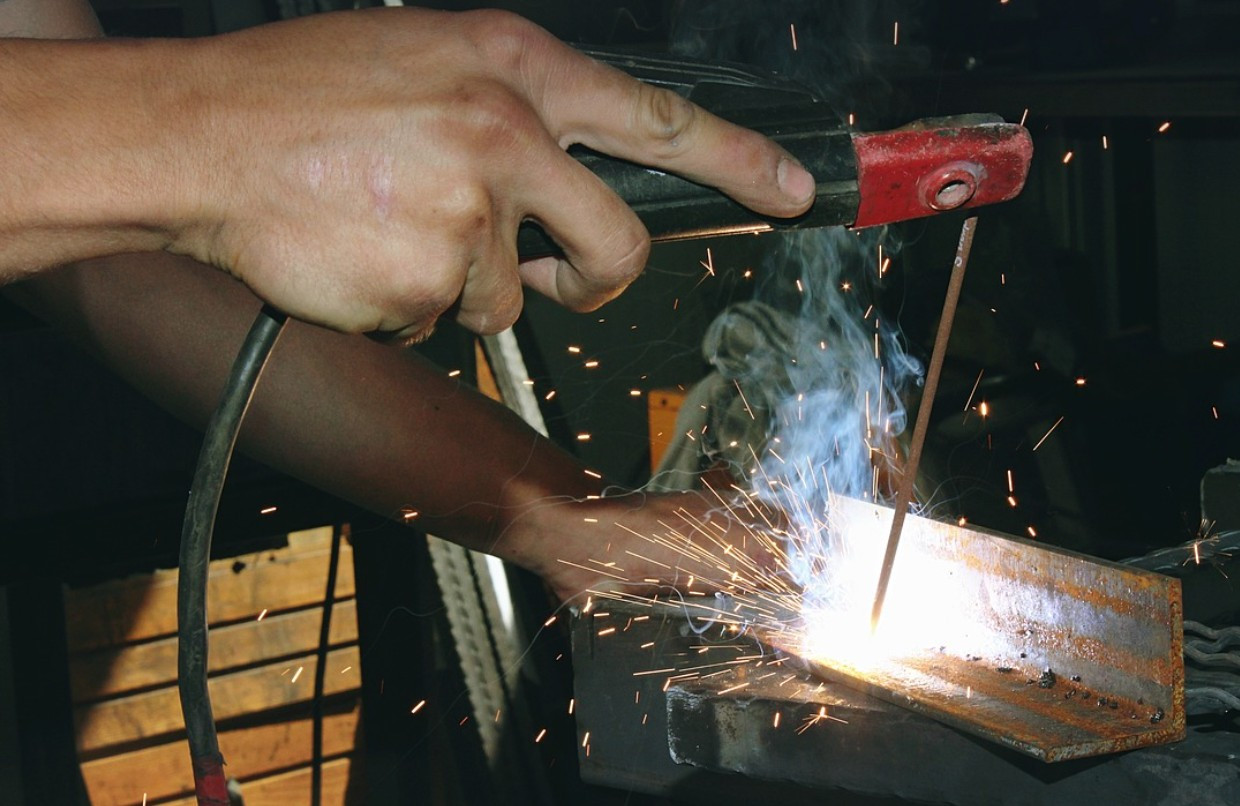
We will cover a lack of safety protocols, poor joint preparation, incorrect machine settings, flawed technique, insufficient shielding gas coverage, lack of penetration, excessive Spatter, porosity issues, fusion defects, cracking and distortion, and more. We will also discuss preventative measures like checklists, visual inspection, proper training, and troubleshooting procedures. Even novice welders can learn to make expert-level welds using the versatile MIG process with vigilance and practice. Let's get started exploring how to make error-free MIG welds!
A Thorough Exploration of Common MIG Welding Mistakes
Lack of Safety
Safety should always be the number one priority when MIG welding. The welding arc can reach temperatures up to 6,000° F, posing risks like burns, electric shock, fire, and explosion. Proper protective gear must be worn at all times. This includes a welding helmet with the appropriate shade lens to protect the eyes and face from UV rays that can cause arc eye injuries. Thick flame-resistant gloves, an apron, and steel-toed boots should be worn to prevent burns. A respirator is recommended to avoid inhaling welding fumes containing toxic gases like ozone, nitrogen oxides, chromium, and nickel.
Workspaces should be clear of flammable materials and have adequate ventilation. Cylinders should be chained securely and kept away from heat or sparks that could cause an explosion. Never remove safety devices from welding equipment. Regularly inspecting and maintaining safety gear will help prevent painful, even deadly, accidents. Don't risk your health by ignoring basic safety rules.
Poor Joint Preparation
Taking the time to properly prepare the joint is crucial to achieving optimal weld quality. All coatings and residues like paint, oil, rust, mill scale, and dirt must be removed from the weld zone through grinding, sanding, or chemically to expose clean metal. The edges should also be ground to remove rounded contours and create a beveled edge, typically 30-45°. This allows the arc and filler metal to penetrate deeply into the joint. If edges are left round, a lack of fusion defects is likely to occur from inadequate penetration of the weld puddle.
Joint designs can be V, double V, lap, T, edge, or butt joints. Gaps between workpieces should be minimized for many joint types. For lap joints, overlapping edges should be aligned flush with each other if possible. Workpieces must also be secured in position using clamps, jigs, or tack welds to prevent movement during welding.
Properly preparing and positioning the joint will allow the welded molten metal to fill and fuse with the base metals. Rushing through joint preparation leads to flaws like gaps, lack of fusion, and poor penetration.
Incorrect Machine Settings
The parameters that must be appropriately set on a MIG welder are voltage, wire-feed speed, and amperage. Selecting optimal values requires understanding how each impacts the welding process and puddle. Voltage controls the arc length and penetration. Higher voltage heats and penetrates the metal more deeply. Excessively high voltage causes undercut, burn-through, and distortion, while very low voltage leads to insufficient penetration. Wire-feed speed regulates how fast filler metal enters the weld puddle. The weld won't fill appropriately if the wire speed is too slow. Too fast, and the wire can overheat or spray unevenly. Amperage controls the overall heat input and puddle fluidity. Low amperage makes a narrow weld and poor fusion. High amperage increases weld width but also the risk of burn-through and distortion.
The correct parameter values depend on many factors - material thickness/type, joint design, electrode wire size/type, welding position, etc. For example, a thin sheet joint would require lower voltage, amperage, and wire speed than a thick joint. Aluminum needs a higher amperage than steel. Vertical-up welds need higher voltage for penetration. Establishing proper settings requires consulting welding procedure specifications and testing welds on scrap pieces of the same thickness. Visually inspect and break-test the welds to dial in optimal settings. Don't rely on vague presets - take time to fine-tune based on your specific project parameters. Keep a log of your final settings for the machine, wire, material, and joint type to easily repeat high-quality welds.
Flawed Welding Technique
Having the welding machine set optimally is important, but the proper manual technique is equally vital to creating a sound weld. The torch nozzle should be held at an angle and work angle of 5-15° downwards to aid penetration, with a 10-15° travel angle in the direction of travel. Maintain a consistent contact tip-to-work distance of about 3/8 in. Excessive distance decreases penetration and increases Spatter. The torch should be moved smoothly and steadily along the joint, never whipping or rapidly shaking the puddle. The travel speed should allow adequate heating of the metal for good fusion without lingering excessively. Weaving the torch in tight side-to-side motions rather than straight parallel passes can help increase penetration and fill the joint. But the weave width should not exceed 2-3x the wire diameter. Excessive or uneven weaving fattens the weld profile and causes undercut defects. Similarly, whip patterns should be smooth and consistent. 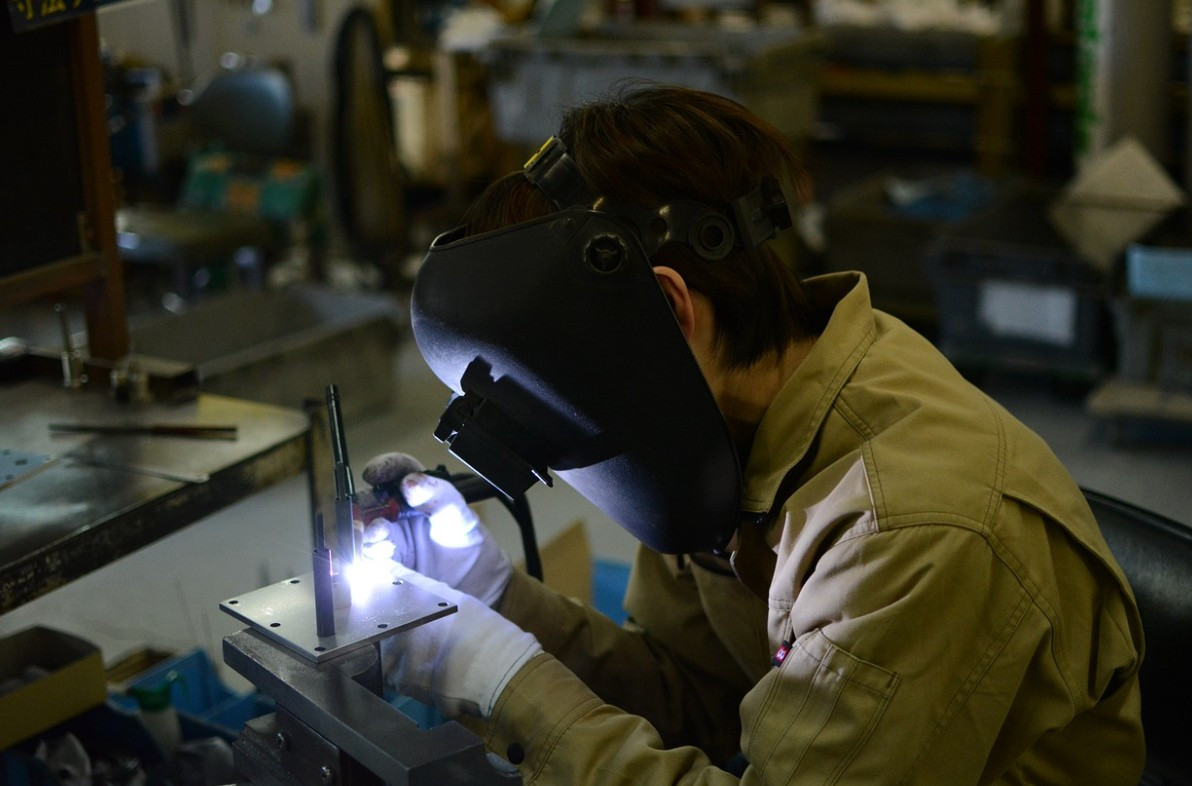
Jerky or curved motions lead to poor weld contour and uneven penetration. It takes practice and muscle memory to master manual welding techniques. New welders should aim to make each pass look uniform, with a consistent rippled pattern and even overlap fading into previous passes. Keeping a steady posture and arm position helps maintain smooth motion. Rushing leads to defects, so build muscle control by taking it slow and practicing on scrap until the technique is perfected.
Poor Shielding Gas Coverage
For MIG welding, shielding from air is provided by an inert gas like argon or helium flowing around the arc. This protects the vulnerable hot metal from oxygen and nitrogen, which can cause defects through oxidation and nitride formation. Flowing at 10-25 CFH, the gas shields an area roughly 2-3 times the diameter of the wire. Any drafts or high winds can disrupt the gas shield, allowing atmospheric weld contamination. Welding outdoors makes maintaining shielding coverage difficult. The gas nozzle should be kept close to the weld and adjusted to be oriented in the direction of travel. If welding outdoors, the welder can position themselves upwind and build shields around the joint.
Clogged nozzles can restrict gas flow and limit shielding. Nozzles should be cleaned or replaced routinely. Gas hose leaks also decrease available shielding gas volume. Leaks should be found with soapy water and sealed with PTFE tape. Low cylinder pressure can indicate leaks or depleted argon supply. Pay attention during welding - discolored weld color, excess Spatter, and soot deposits indicate loss of gas shield. Take simple steps like cleaning nozzles and protecting the work area from drafts to maintain coverage.
Insufficient Weld Penetration
A lack of full penetration through all joined base metals is a common issue affecting weld quality. Partial penetration flaws leave a weak area that risks crack formation under stress. Insufficient heat input is often the cause - amperage may be too low for the material thickness or travel speed too fast to adequately melt the joint. Very thin materials may require reduced voltage to prevent burn-through. Novice welders failing to hold a steady angle and keep the arc centered over the joint as they progress can also lead to inconsistent penetration. Edge preparation is another factor - poor beveling or gaps between plates prevent the puddle from reaching full depth.
Certain joint types, like lap fillet welds, are also prone to partial penetration defects. Fillet welds are typically made with a slower zigzag technique to allow time for sidewall fusion without melting through. When penetration is inadequate, the underside of the weld will show rounded valleys with limited fusion between passes. The fix is adjusting technique - slowing travel speed, adding a back step pattern, or more slowly weaving the arc to improve lateral heat input. If reducing voltage/speed doesn't increase penetration, amperage needs to be increased or joint preparation improved. Make enough test passes on scrap to dial in settings and motions that achieve full penetration through the joint. Use visual inspection of the underside and destructive break tests of welds to confirm penetration is complete before welding actual parts.
Excessive Spatter
Spatter is the metal droplets thrown out from the weld puddle as it solidifies. Excess Spatter causes weld quality issues and finishing problems. Several factors contribute to higher spatter levels in MIG welding:
- Too long stick out of electrode wire past the nozzle
- Higher current settings than optimal
- Clogged nozzle and poor gas flow
- Improper torch angles and arc length
- Rust, mill scale, or moisture on the base metal
Reducing voltage closer to optimum and cleaning nozzles can help reduce Spatter. The contact tip to work distance should be consistent at around 3/8 inch. New welders should take care not to wave the arc too rapidly. Any adjustments that improve gas shielding will also limit oxidation, contributing to Spatter. Proper parameter settings and techniques provide an optimal balance between penetration, bead profile, and low Spatter.
Porosity in Welds
The irregular holes and tunnels found inside welds, known as porosity, significantly weaken the joint and pose a quality issue. Gas bubbles can get trapped in the cooling weld metal during solidification, leaving voids behind. Shielding gases like argon and CO2 are common sources of these trapped gas pores when the flow is too high. Flux residues from self-shielded wires can cause porosity through gas release as they burn off. The heat vaporizes grease, oil, paint, or solvents left on the base metal, contaminating the weld gas. Moisture pickup and rust generate hydrogen gas that gets trapped during cooling. 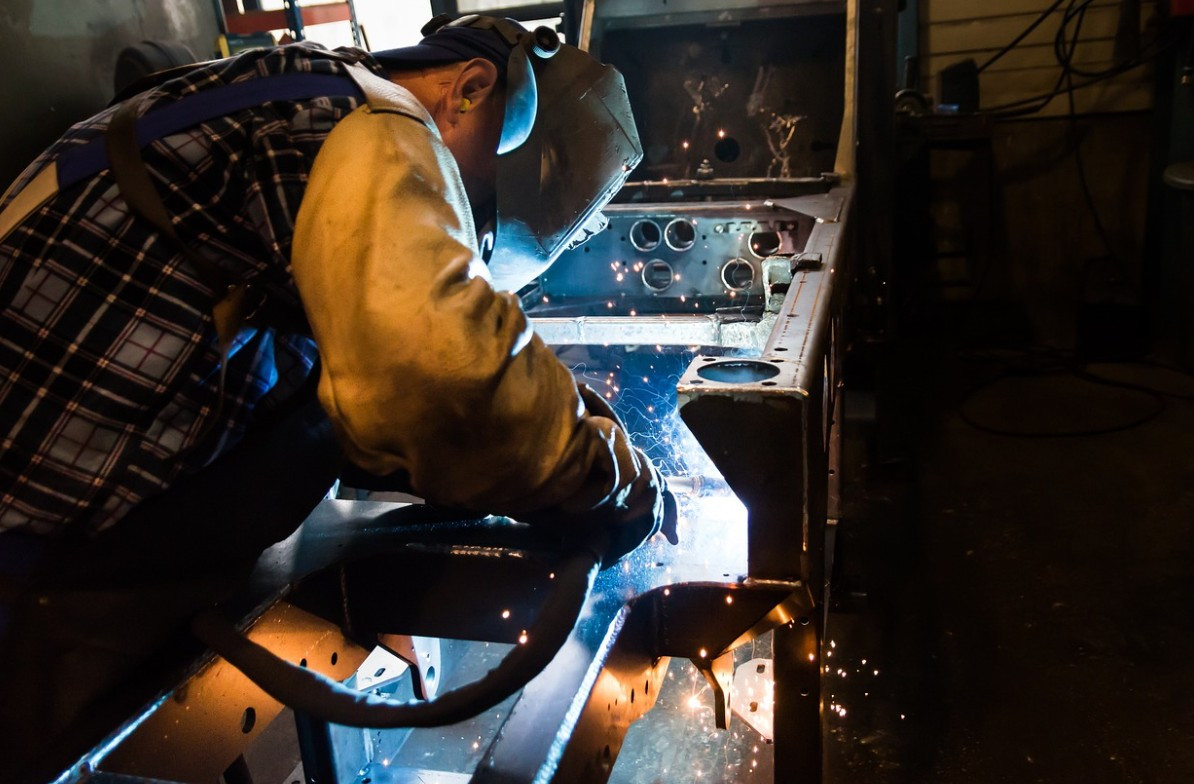
Drafts and gusts that disrupt the shielding gas commonly cause atmospheric contamination, leading to porous welds. Keeping joints and wire clean and dry while preventing drafts through shielding helps avoid problems. Low heat input can also increase porosity by preventing bubbles from floating out of the puddle. Increasing current and widening the puddle pattern allows gas bubbles to escape. Oscillation and backstepping improve fluidity. Preheat thick sections to 150-300°F before welding to reduce shrinkage stresses that pull gas into the weld during cooling.
Porosity is best prevented through control of the welding environment. If the porosity is excessive, try a new shielding gas cylinder to prevent contamination. Keeping everything clean and dry while protecting the weld from drafts will produce pore-free welds.
Lack of Fusion Defects
Fusion refers to the bonding between the weld deposit and base metal. When fusion is incomplete, defects form where the weld doesn't properly join the two pieces of metal. Lack of fusion is often related to poor joint preparation. Leaving rounded edges prevents the arc from penetrating and fusing with the sides of the joint. Similarly, gaps or misalignment between parts leave crevices and voids along the weld interface. Dirty, oily, painted, or corroded weld zones prevent fusion bonding. Slow travel speed and low heat input can solidify the puddle before properly wetting the joint. Weaving too wide spreads the arc heat and can reduce fusion on the edges. Careless torch angles where the arc lags on one side also decrease fusion on the other.
Proper joint cleaning, design, and alignment is the first step to avoid fusion defects. Maintaining the torch directly over the seam will focus penetration equally on both sides. Travel speed should allow time for the puddle to fully wet and fuse with the base metals on the leading and trailing edges before freezing. Consistent technique following the weld profiling helps prevent drift, for fillet welds on lap joints, weaving, and whip patterns assist in melting and fusing the vertical walls. Inspecting the underside or backside of the weld will reveal any lack of sidewall fusion or joint penetration. Taking time with joint preparation, technique, and parameter settings results in thorough fusion in the weld area.
Distortion and Cracking
The intense heating and subsequent rapid cooling of MIG welding creates residual stresses in the part that often manifest as distortion, like warping or buckling. Joint geometry, technique, and heat input all contribute to distortion risks. Thin materials are more prone to warping, as longer welds are required on larger parts. Techniques like excessive weaving or whipping increase localized heating. Using more current and voltage than necessary leads to higher residual stresses. Joint designs with unbalanced welding on one side predispose the part to angular distortion toward the welded side as it shrinks and pulls the other side. Poor joint fit-up with large gaps makes distortion more likely.
Steps can be taken to minimize the likelihood of weld distortion and related Cracking. Jigs and fixtures that clamp parts firmly and uniformly can resist warping stresses. Balanced welding on either side of the neutral axis reduces pulling. Proper preheating allows thermal stresses to equalize before welding critical areas. Peening each weld pass stretches the steel surface to relieve stresses. Skipping welds or backstepping breaks up the heat concentration. Keeping heat input low yet sufficient for full penetration will produce the least residual stresses. Allowing adequate preheat and post-weld cool-down time avoids concentrated heating or cooling that worsens cracking. Consider stress-relief heat treatment after welding is complete for highly susceptible materials and joints to reduce residual stresses. Staying vigilant to use minimum needed heat input and thermal management gives the best chance of preventing cracking and distortion defects.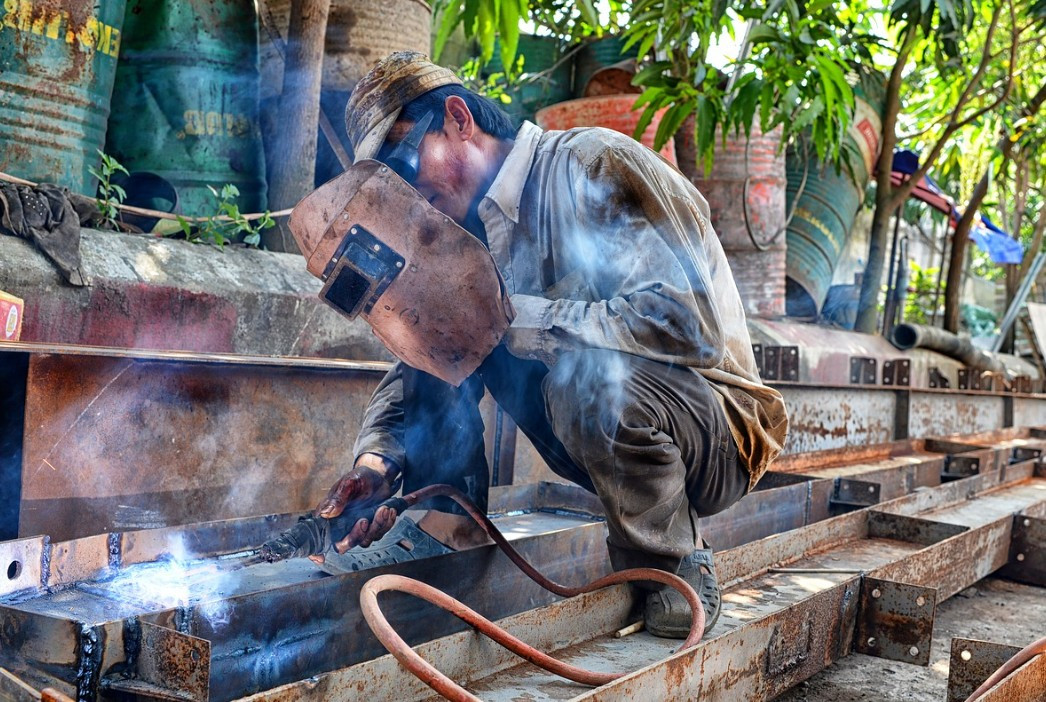
Other Errors
- Wire stubbing occurs when the arc is interrupted with the wire still in the weld, leaving a short length sticking out. Prevent this by keeping a steady hand motion when ending a weld, backing the wire out of the puddle before breaking the arc.
- Touching welds before they have cooled causes surface defects and risks cracking the hot metal. Leave welds undisturbed until they have cooled below 200°F.
- Soiled filler wire contaminates welds through inclusion defects. Store wire in clean, dry conditions, away from dirt and moisture. Regularly replace the wire on the spool.
- Base metals must also be cleaned before welding to prevent contaminants like paint or grease from entering welds through fumes or Spatter.
- Welding machine settings creep over time. Recheck parameters periodically, even if using established settings. Do test welds on scrap, especially for critical welds.
- Clogged nozzles prevent smooth wire feeding. Clean nozzles regularly by removing and brushing out accumulated Spatter. Replace badly deformed nozzles.
- Leaving machines on for long periods shortens the lifespan of torches and nozzles through overheating damage and accumulated spatter buildup. Shut down when not actively welding.
How to Troubleshooting MIG Welding Problems
Troubleshooting MIG welding problems is a crucial skill for welders to ensure the quality and integrity of their welds. Here's a comprehensive list of steps and considerations for troubleshooting common MIG welding issues:
Check Power Source
Ensure the welding machine is receiving adequate power.
Verify that the voltage and wire feed settings match the recommended parameters for the welded material.
Inspect Ground Connection
Ensure a secure, clean ground connection between the workpiece and the welding machine.
Remove any paint, rust, or dirt that may hinder the grounding.
Wire Feeding Issues
Examine the wire spool for any tangles, knots, or restrictions.
Check the drive rolls and tension settings to ensure smooth wire feeding.
Gas Flow and Shielding Gas
Confirm the proper flow of shielding gas.
Inspect the gas hose and connections for leaks.
Adjust the gas flow rate according to welding specifications.
Wire Quality and Type
Verify that the welding wire matches the material being welded.
Check for any signs of rust, dirt, or defects on the wire.
Ensure the wire diameter corresponds to the machine's specifications.
Contact Tip Issues
Inspect the contact tip for wear, damage, or blockage.
Ensure the contact tip size matches the wire diameter.
Tighten the contact tip to prevent electrical resistance.
Drive Roll Issues
Examine the drive rolls for wear and proper alignment.
Adjust the tension on the drive rolls according to the wire size.
Clean any debris from the drive roll grooves.
Welding Technique
Evaluate the welding technique for consistency and proper travel speed.
Avoid excessive stick-out, which can lead to irregularities in the weld.
Ensure the gun angle and travel angle are appropriate for the joint configuration.
Gas Nozzle and Diffuser
Check the gas nozzle for damage and ensure it is the correct size.
Inspect the diffuser for clogs or wear.
Maintain the recommended distance between the contact tip and the workpiece.
Inspect Weld Puddle
Observe the weld puddle for irregularities, such as excessive Spatter or incomplete fusion.
Adjust the voltage and wire feed speed for proper penetration and bead appearance.
Clean Base Metal
Remove contaminants from the base metal, such as oil, grease, or paint.
Ensure the workpiece is free from rust or oxidation.
Machine Calibration
Periodically calibrate the welding machine to ensure accurate settings.
Refer to the manufacturer's guidelines for calibration procedures.
Safety Precautions
Use appropriate personal protective equipment (PPE), including a welding helmet, gloves, and safety glasses.
Ensure proper ventilation to minimize exposure to welding fumes.
By systematically addressing these troubleshooting steps, welders can identify and rectify issues in MIG welding, ensuring consistent and high-quality welds. Regular maintenance, adherence to safety protocols, and a thorough understanding of welding parameters contribute to successful troubleshooting in MIG welding processes.
Preventing Future Errors
Learning from past mistakes and taking steps to prevent them in the future is key to perfecting welding skills. Every welder was new once, and improving results requires diligence. Here are proactive tips:
- Make checklists for required safety gear and remember key joint preparation steps, machine settings, and technique pointers for each weld type. Review them before each job.
- Keep notes nearby to record voltage, wire speed, and gas flow parameters that produce good results on each welding project. Refer back to previous numbers to eliminate guesswork.
- Visually inspect the backside and underside of each weld. Compare to example photos of good welds and common defects. Critical self-examination instills helpful attention to detail.
- Before starting any major weldments, perform test welds on scrap pieces of the same material and thickness. Check penetration and setting adjustments until satisfied.
- Ask a colleague or supervisor to periodically observe and critique your welding technique and finished welds. Take their feedback positively.
- Continue practicing even after initial training to keep movements sharp through muscle memory. Don't let skills atrophy.
- Read articles and watch videos on welding tips and common issues. Continued learning prevents the development of sloppy habits.
Takeaway
In summary, MIG welding has some common pitfalls, like poor wire stick out, incorrect voltage, poor wire speed and angle, and poor joint preparation that can lead to defects and weak welds. However, being aware of proper settings and techniques like maintaining proper stick out and angle, using the right voltage and wire speed, cleaning joints, and practicing good welding motion can help avoid these mistakes. With proper training and practice, MIG welders can learn to make quality, strong welds free of defects. Following welding best practices and procedures is key to success.